
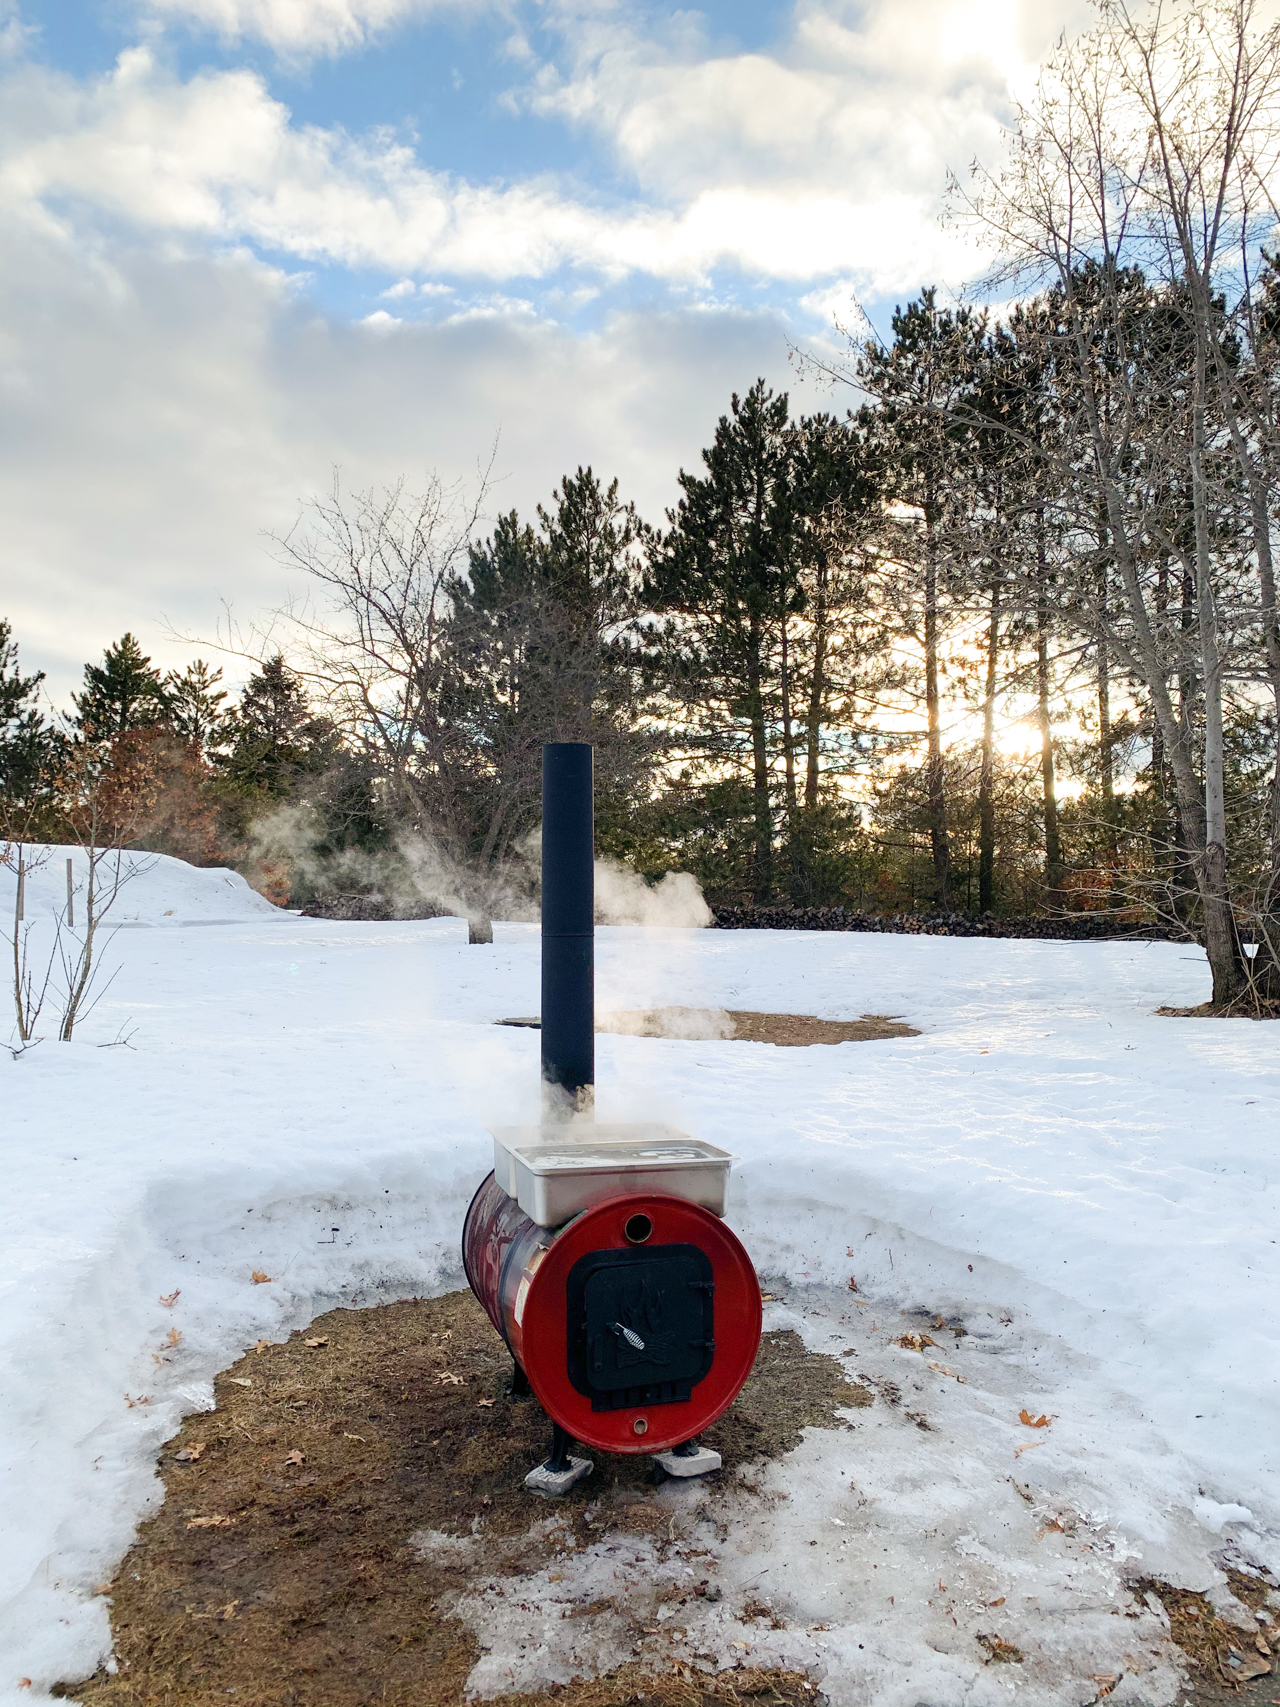
DIY Maple Syrup Evaporator on a Budget
Last year, we boiled our sap over an open fire; you can see a photo of it in this blog post. The problem with this setup was that the smoke would swirl around our pots of sap, which ultimately caused our syrup to have a smokey, campfire flavor to it. Not exactly what you want on your pancakes.
So this year, we wanted to build something that would direct the smoke up and away from the pans of sap. After a bit of research and design, my husband constructed this evaporator out of an old steel barrel! It worked like a charm and our maple syrup tastes SO much better this year.
Check out the step-by-step instructions for this DIY maple syrup evaporator below!
Overview
supplies + cost
55-gallon steel drum ($10) · wood stove kit ($46) · 2 stovepipe pieces ($7/each, $14 total) · 2 full-size steam pans ($20/each, $40 total) · firewood · cast iron wood stove grate (optional, $5)
total cost: $115
tools needed
Angle grinder with cutting blade · two-foot level · pencil · aviation shears · screwdriver · wrench · drill + drill bit · tape measure
Step by Step Instructions
Step 1 | find a barrel
We used a 55-gallon steel drum that we found on Facebook Marketplace.
Step 2 | install wood stove kit
Purchase a wood stove kit (includes door, feet, pipe collar) and install it into the barrel using the instructions provided by the kit. You’ll also need to buy two 6″ x 24″ stovepipe pieces separately. We placed the stovepipe opening as far back as possible.
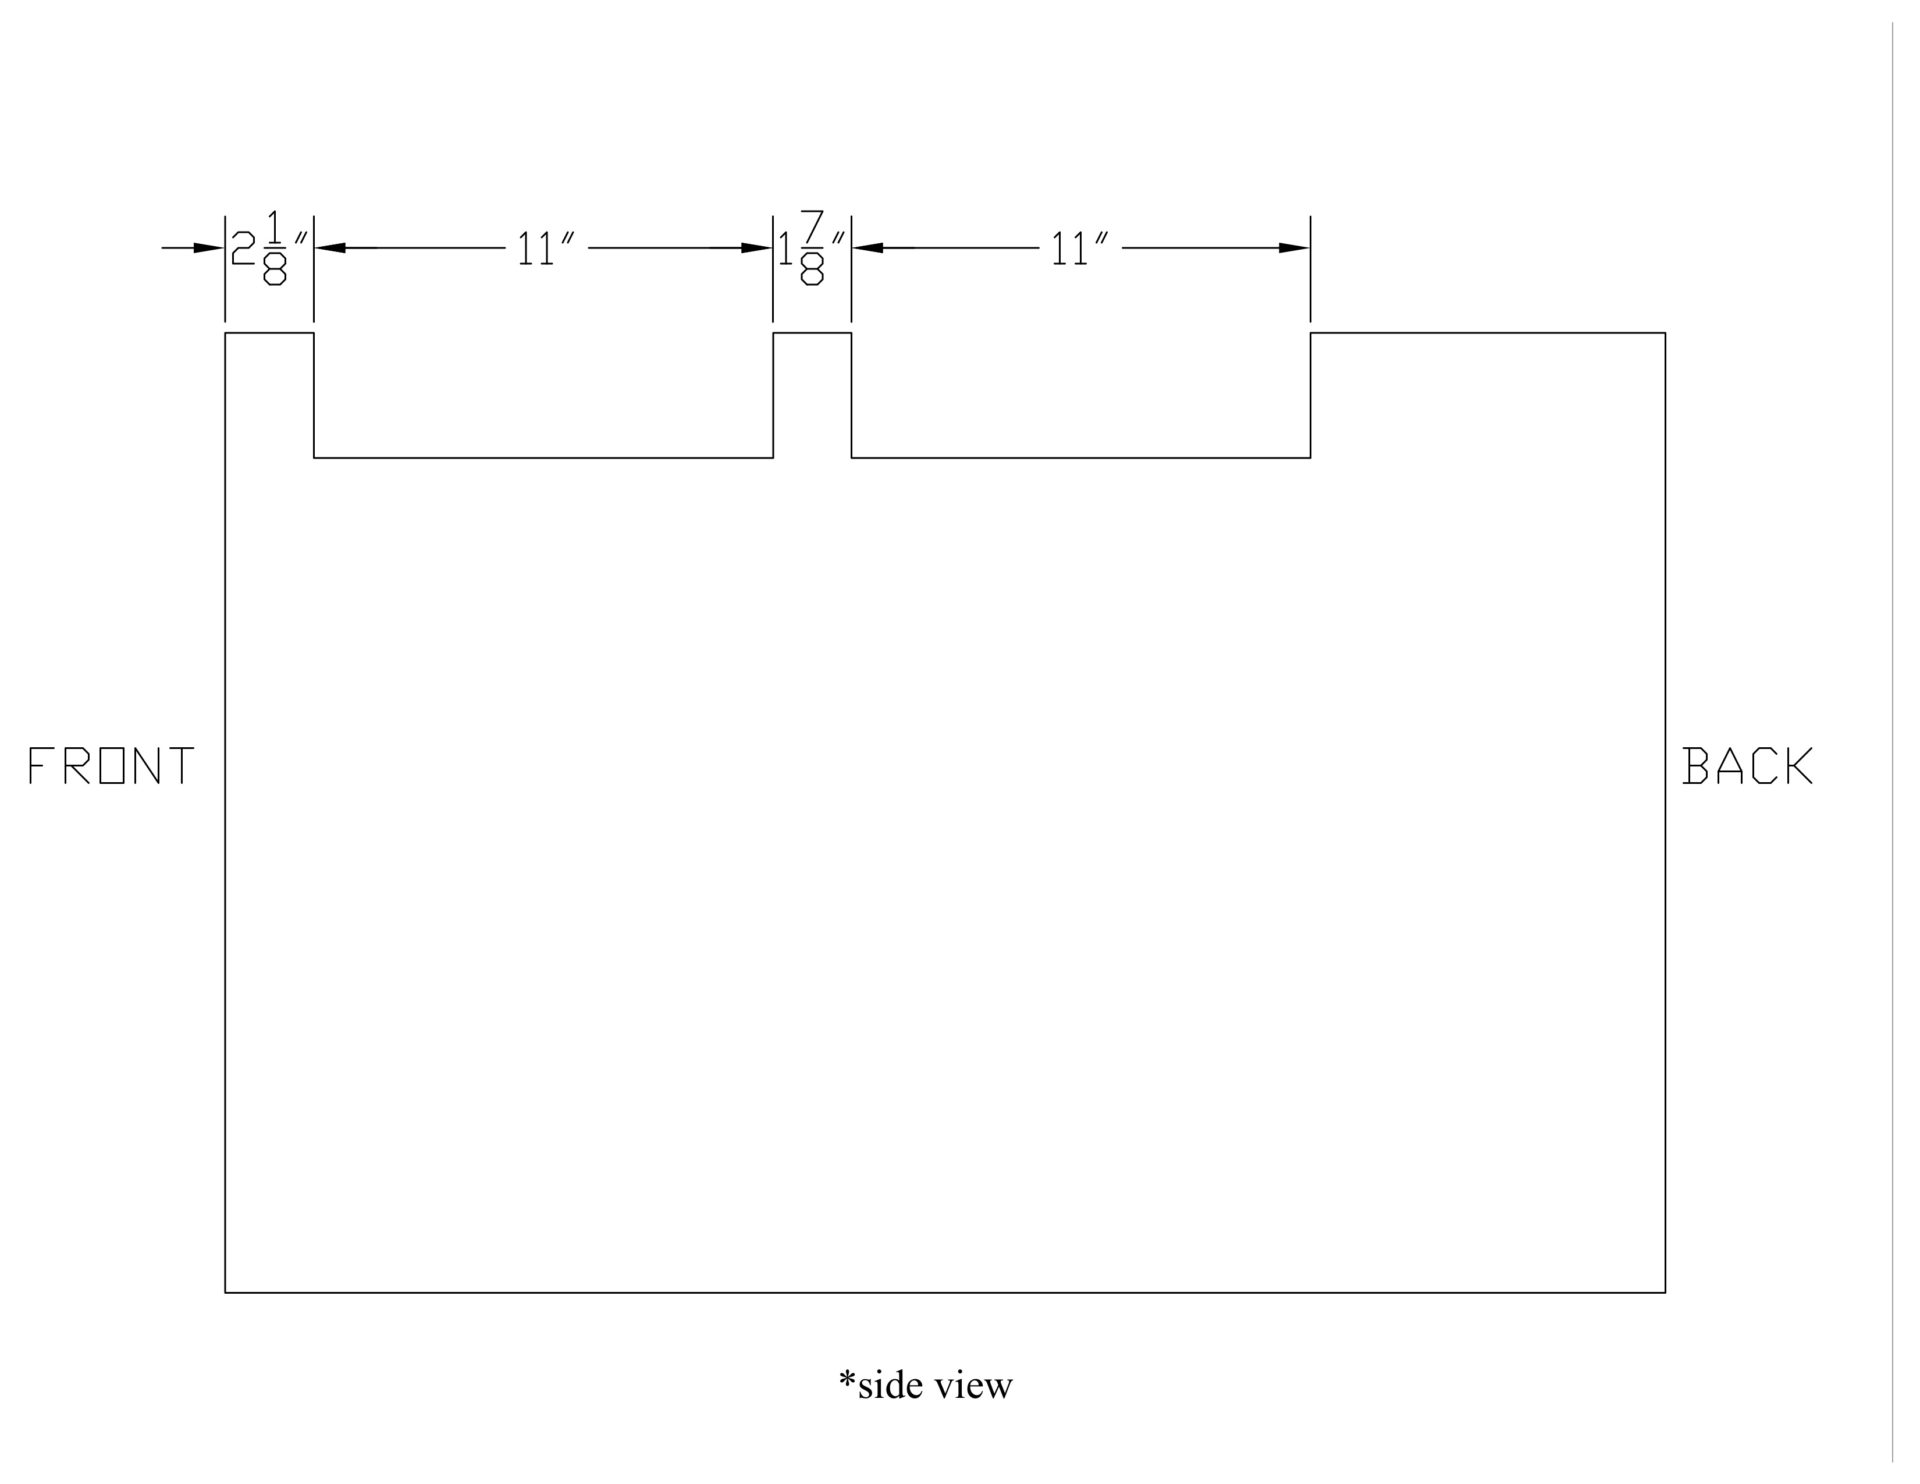
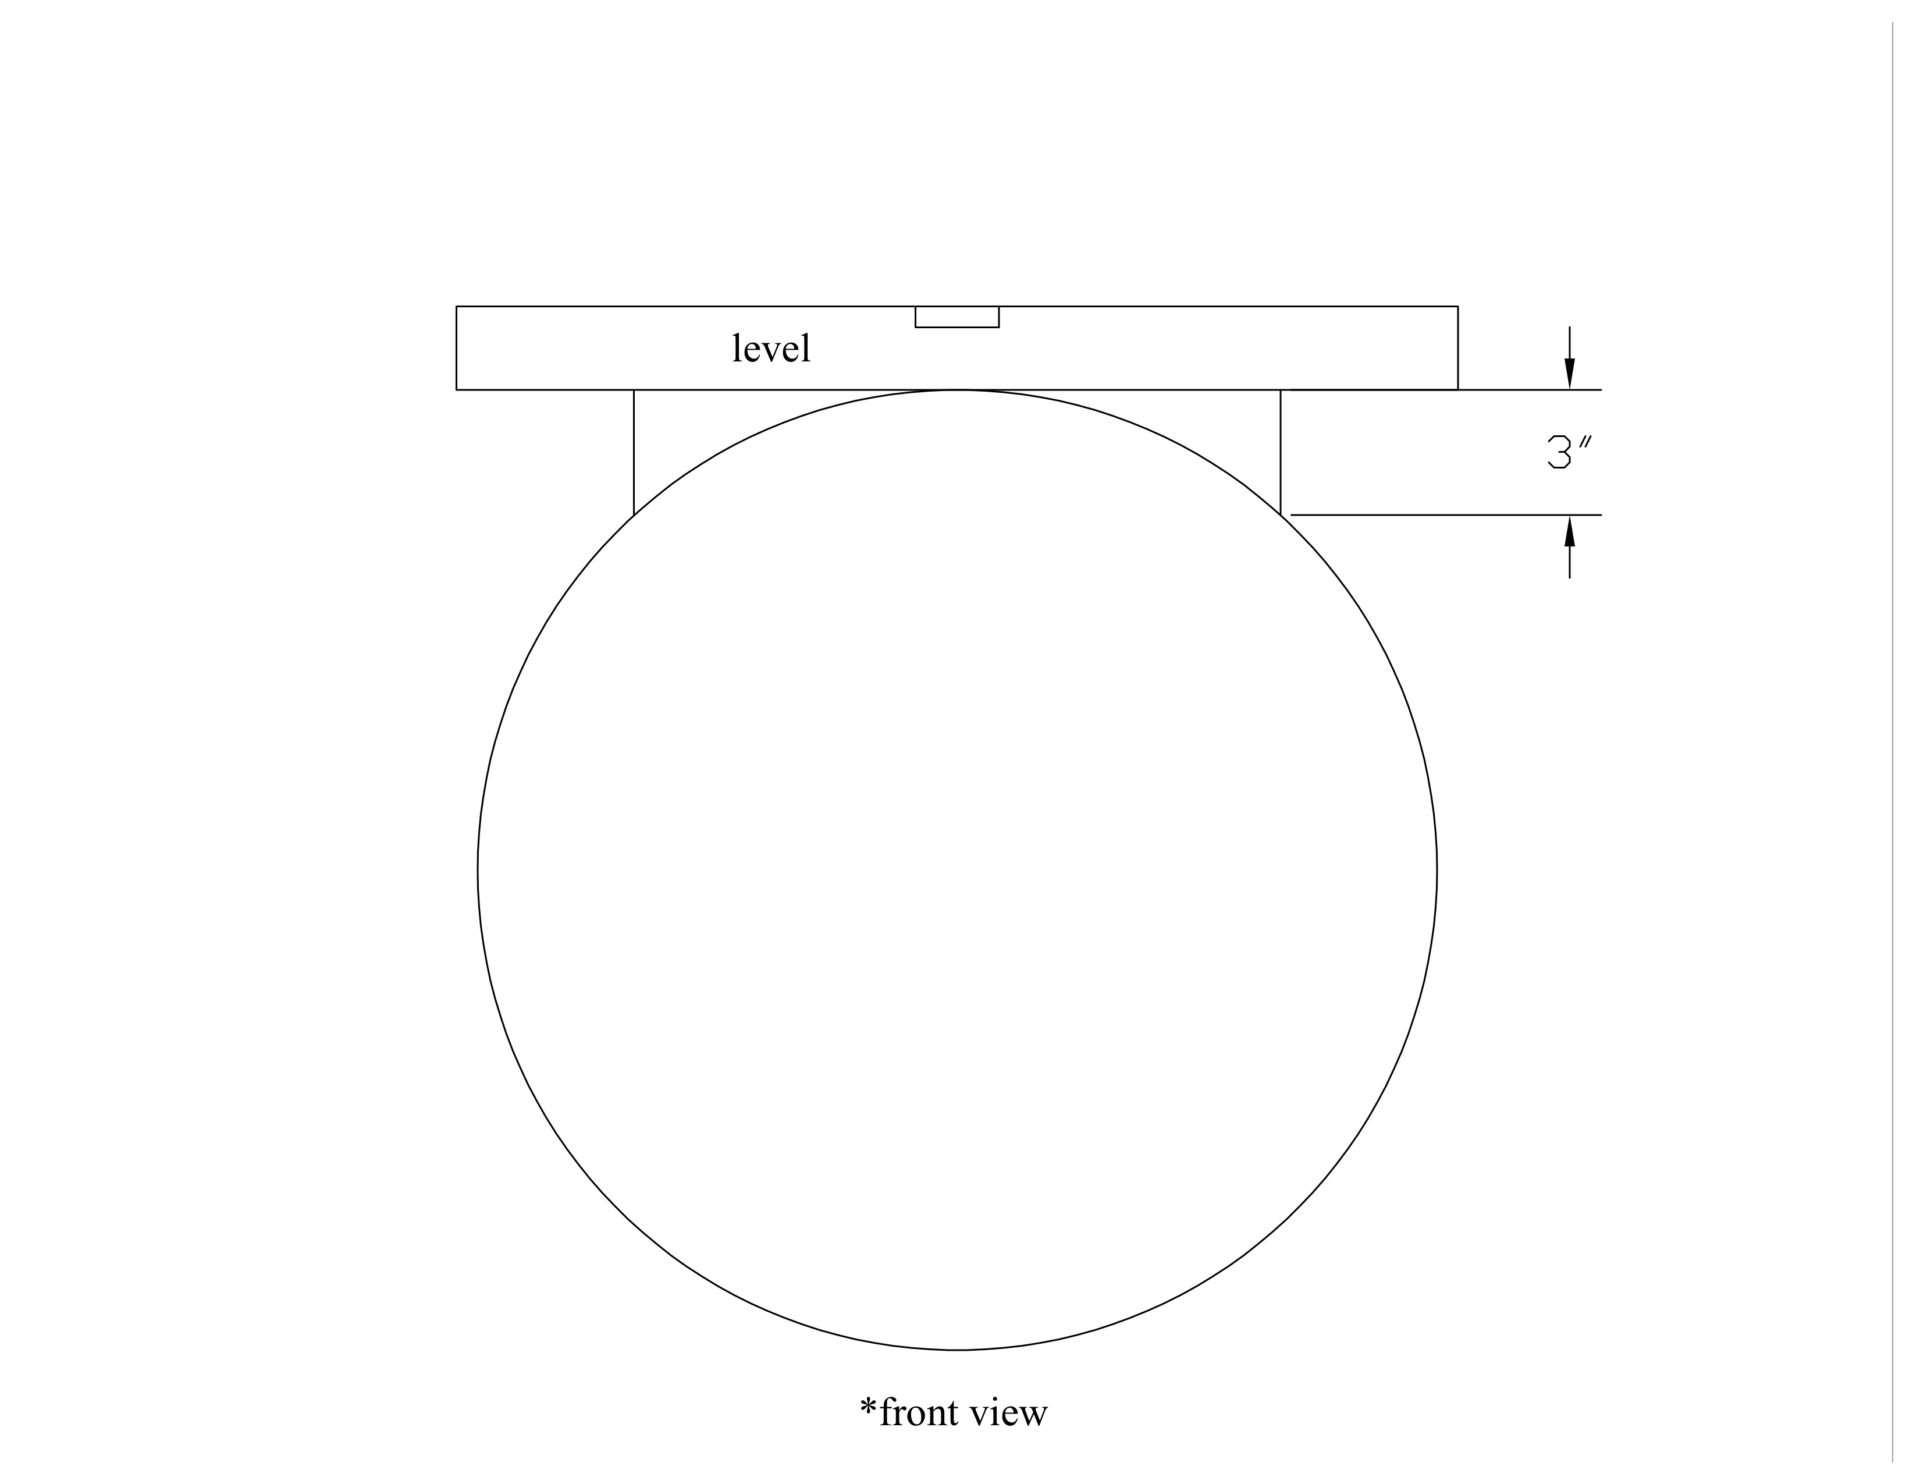
Step 3 | cut the openings on top
The next step is to cut the two openings where your pans will sit (we used these pans). Make sure your barrel is on a level surface. The dimensions that we used are laid out in the diagrams below.
Step 4 | final touches
Add sand to the floor of the evaporator (this is to prevent the hot coals from burning out the bottom of it). We also bought a wood stove grate from FB Marketplace to put inside but this is optional.
Lastly, place pans in the opening and put the stovepipe on. Pour the sap into the pans, start a fire, and start boiling!
notes
– I would suggest finding a black-colored barrel. We used a red one but most of the red paint burned off once it got too hot.
– The back pan boiled a lot hotter than the front pan. It’s helpful to rake the coals forward every so often to distribute the heat.
Should you line the barrel with fire brick